
Mappings
Overview
Data Mappings are configured data conversions for an integration workflow. They take an input Data Type and convert it to a different output Data Type.
Data Mapping input:output can be 1:1, 1:many, or many:1.
Some examples of standard data mappings are:
- HL7 v2.x ADT message -> FHIR Patient Resource
- Custom JSON Document -> FHIR Patient & FHIR Document Resource
- HL7 v2.x SIU message -> Custom JSON Document
- HL7 v2.x SIU message -> FHIR Patient & FHIR Appointment Resource
Intely Data Mappings can be customized to meet your specific workflow needs and set up through a point-and-click configuration.
Example Data Mapping:
Click on the image to zoom in!
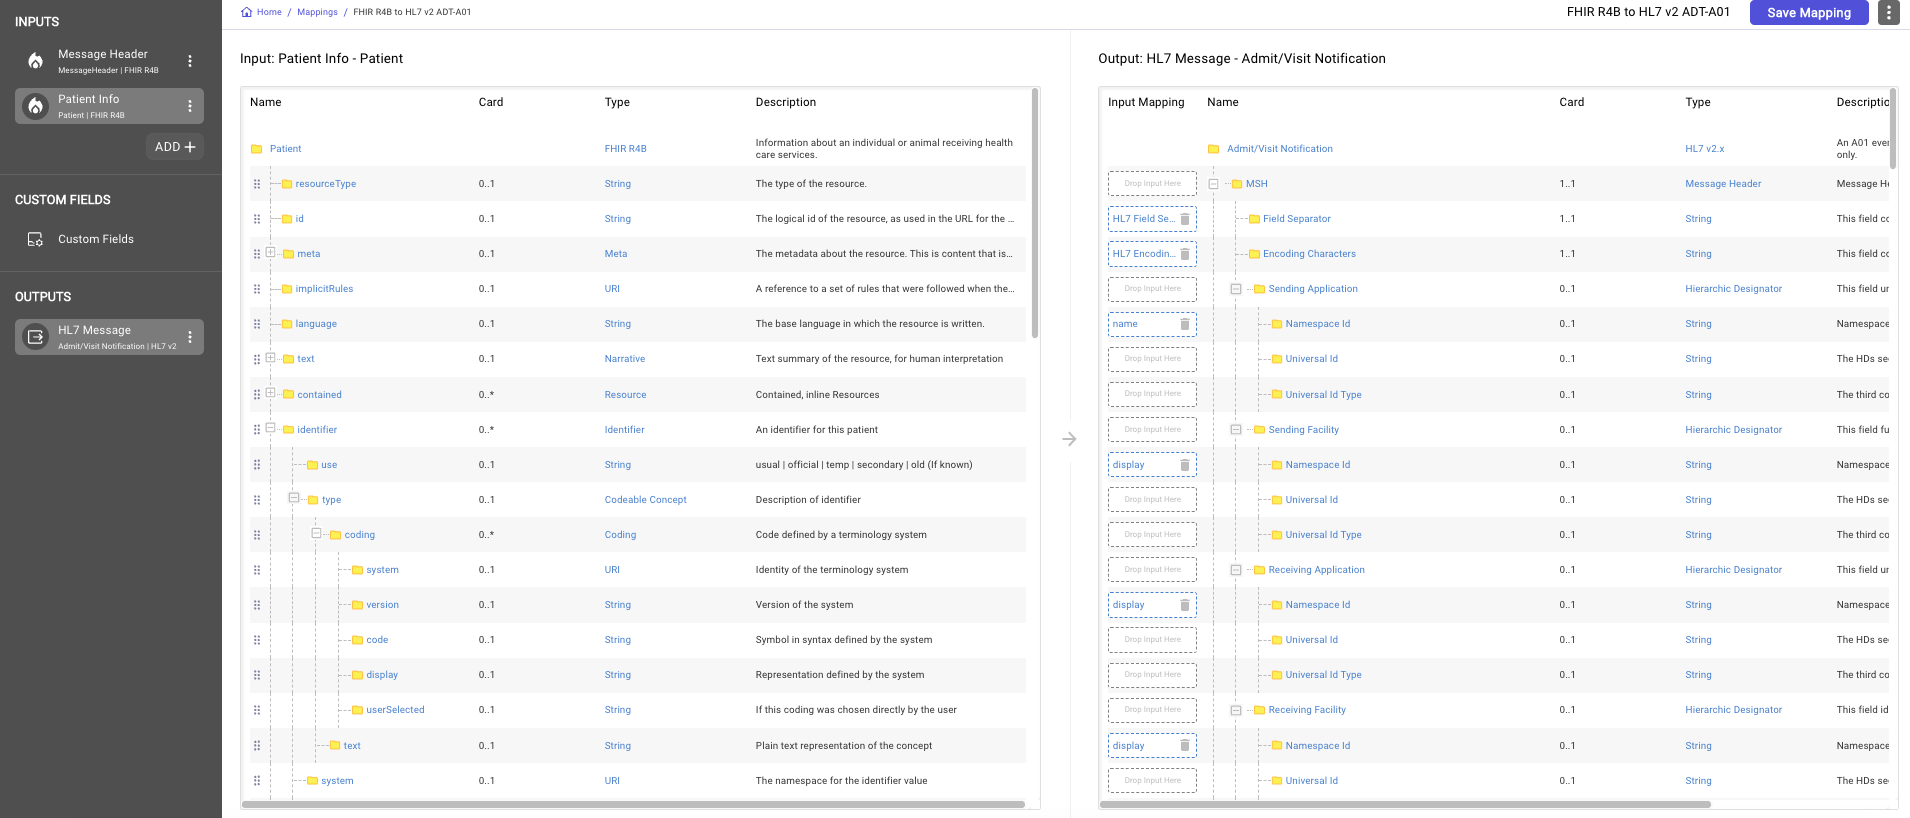
An example Data Mapping from FHIR R4B Patient to HL7 v2.x ADT_A01
Creating a Mapping
To create a new mapping, navigate to the My Mappings from the left menu when at the Connect (integrations) dashboard. Once on the My Mappings screen, select the 'Create Mapping' button on the top right.
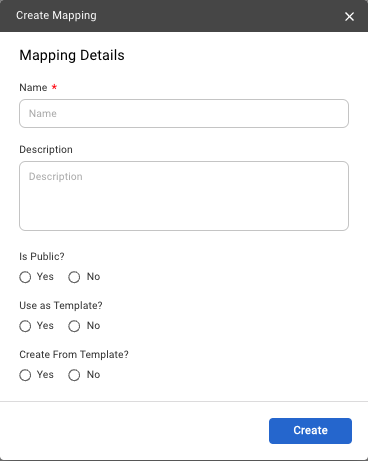
Mapping Details
- Name: (Required) reference name of the mapping. This is what shows in the UI when selecting a mapping.
- Description: User defined overview of what data this mapping is transforming.
- Is Public?: Determines if this data type is available to users outside of your organization
- Use as Template?: Determines whether this mapping is available when creating a new mapping from a template
- Create from Template?:
- If Yes: 'Choose Template' dropdown shown, select appropriate mapping template
- If No: Input/Output fields shown. Name field is user defined, will be used in field names (shown below) and Convert step parameters when selecting input data. Data Type is the expected data structure for either the input or output.
Left Menu
On the left menu, you'll find the config features that allow you to adjust/create/transform the data that is being handled or moving through this mapping.
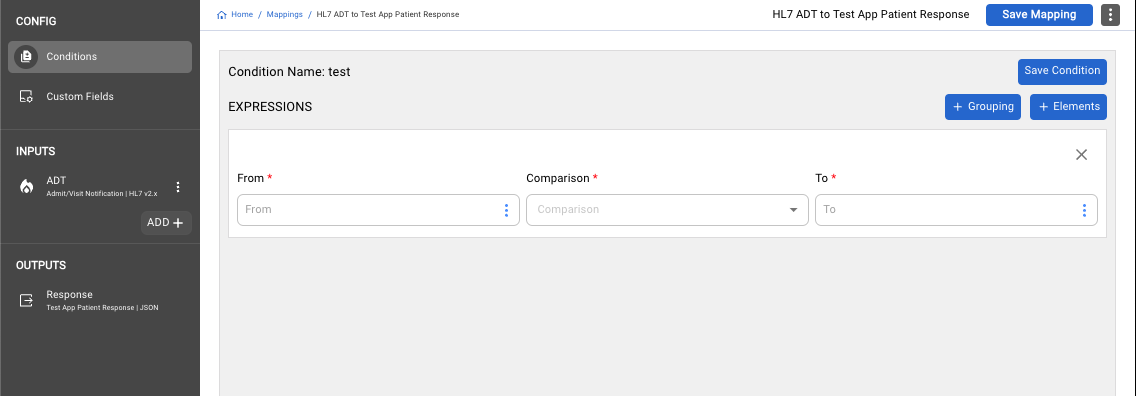
Conditions
This feature gives the user ability to have logical evaluations take place during the mapping. These evaluations take place and rely on what is built/received in the input. A typical use case for this feature would be if a single delimited file had multiple facilities included, users could build conditions to only evaluate where the input facility equals 'Facility 1'. These conditions are selectable on the Convert step in the Integration Builder and evaluate at runtime.
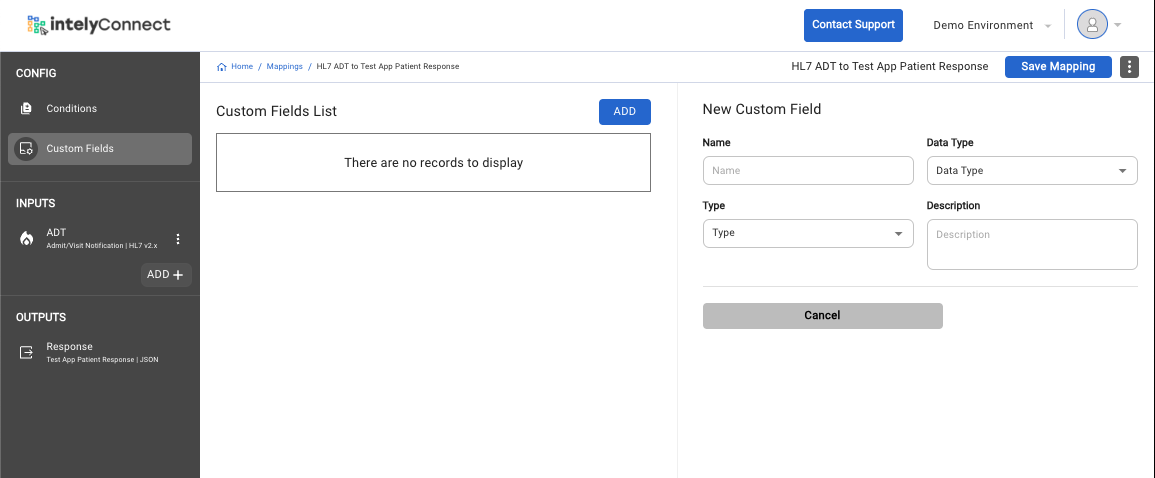
Custom Fields
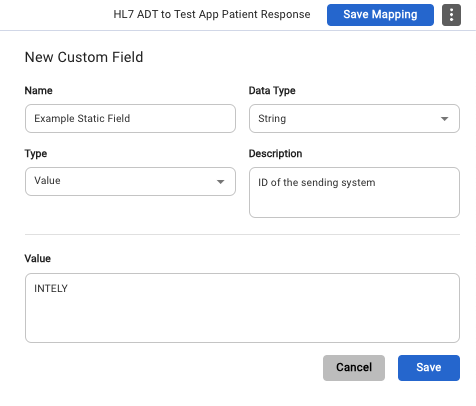
Custom Fields give users a way to build or create fields for the output payload whether that's a manipulation of the input data or a static value that isn't in the input but is needed for the output. Custom fields are mapping specific and will not be shared across mappings, they would need to be rebuilt manually.
To create a custom field or edit an existing field, click on 'Custom Fields' in the left menu. This will navigate you to the custom fields data grid (if fields exist grid will show, otherwise a message will appear state there are no custom fields for the mapping). The data grid will replace the left portion of the screen, if you need to view the input again you will need to select the input in the left menu. When you create or edit a custom field, the custom field builder replaces the right portion of the screen where the output normally appears.
New Custom Field (Value)
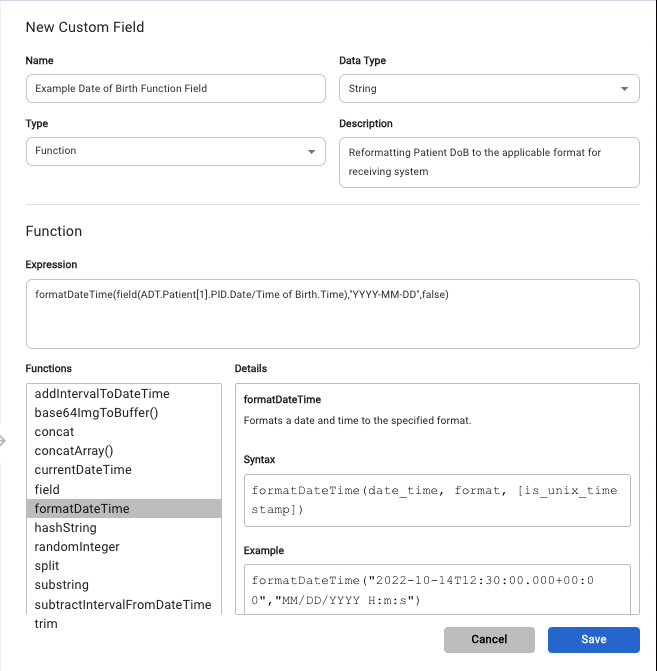
New Custom Field (Function)
Inputs
This area shows all the inputs that are expected and usable for this mapping. Users select a single input when creating a mapping but can add other inputs from this left menu screen. Simply click 'ADD +' under inputs and select the applicable data type that represents the input that is being added and give it a name. If users need to edit an input (alter name, change data type) they can select the ellipsis and a modal to edit the input will show. Users can leverage multiple inputs in a single mapping and can toggle between inputs by selecting the one they would like to view in the left menu.
Outputs
Outputs show the expected data format or Data Type of the output from this mapping. Users will select the output when creating the mapping. At this time, users can only map to a singular output. Intely plans to allow users to map to multiple outputs in the future.
Adding fields to mapping
Mapping a field from input to output is an easy process. From the input select the field that should be mapped, click + hold then drag that field to the applicable dropzone in the output. You should see the input field name populate the output dropzone showing that it was mapped. Once mapped, users can leverage additional features to transform a field when it is being mapped and the output is being created in the workflow. These features can be found by selecting the ellipsis on the dropped field from the input and choosing 'Edit'.
Data Filters
Filters provide a method to specify the selection of data in a payload. The filters in Intely use logical operators and the fields in a data type to qualify a specific field value.
This can be extremely helpful when working with a large bundle of data or a data structure that may have generic, repeating properties.
Filters are available to set up on each field mapping and will present for the user after dragging an input field to an associated output field.
For example, If I wanted to get the Patient Email from this payload, I would get the email from the Fieldext] v value WHERE the Fieldame] = = "Patient Contact Email".
"Fields": [
    {
        "Name": "Patient Contact Email",
        "Type": "string",
        "Text": "[email protected]",
        "Page": 1,
        "Confidence": 0.99
    },
    {
        "Name": "Patient Last Name",
        "Type": "string",
        "Text": "Daniel",
        "Page": 0,
        "Confidence": 0.941
    }]
Data Crosswalks
Crosswalks provide a simple way to convert individual field values on the fly during during a mapping. Source and destination systems may have different ID's, reference values, or any other data that need to map to each other during a conversion.
Crosswalks are available to set up on each field mapping and will present for the user after dragging an input field to an associated output field.
For example, if a source system produces a User Name, but the destination system expects a User ID, a Crosswalk comes in handy. When John Smith is present in a particular field, the mapping will convert the value to 123 for the destination system.
This is a simple example but shows how Crosswalks can be applied to many types of field translations in a mapping.
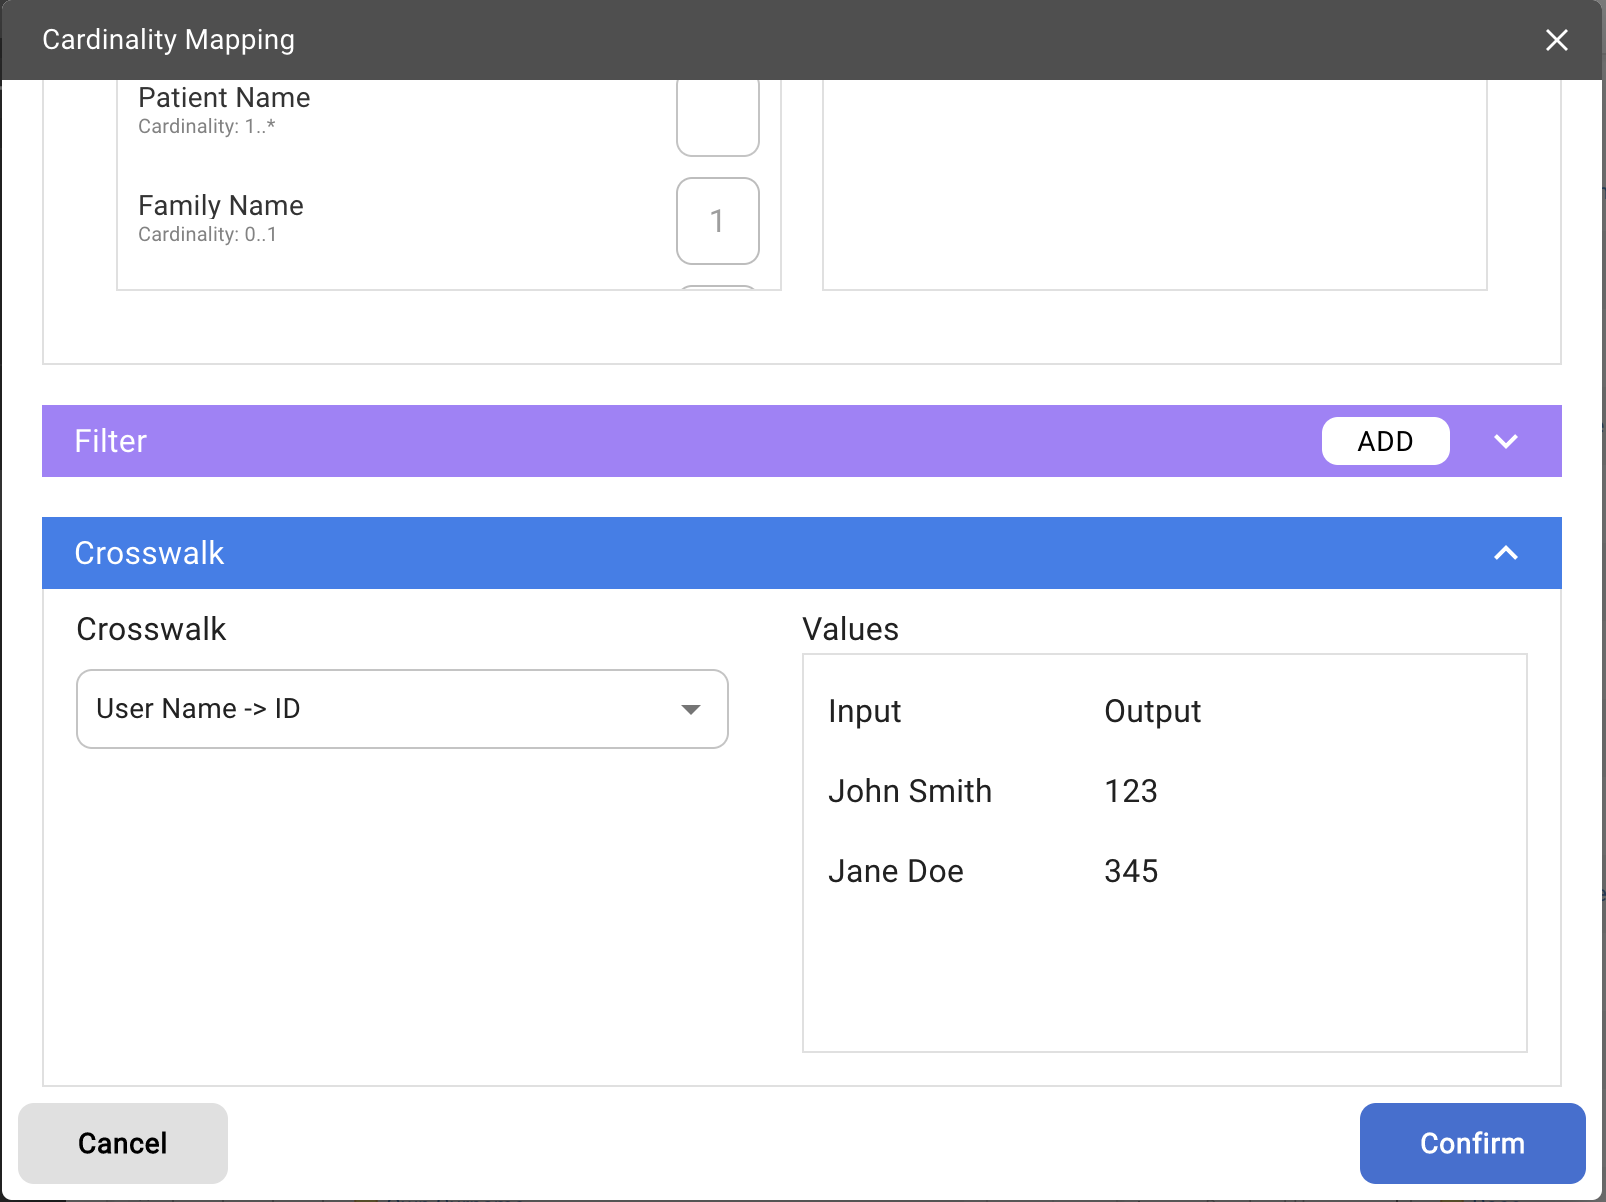
Example Data Value Crosswalk
Updated 11 months ago