
Data Types
Overview
Data Types are schemas that define the hierarchy or structure of external applications data. The My Data Types section of the Intely App is the connective tissue for the Intely interoperability platform.
Intely uses standard and user-defined Data Types to define an Intely App's Resource requests and execute integration workflows. Data Types define if a field is optional or required and repeatability.
Intely supports Data Types for:
- JSON
- FHIR R4
- HL7 v2.x
- C-CDA
- Key-Value
- Delimited (CSV)
XML and other new data types are on Intely's roadmap. If you don't see your data format supported, let us know!
My Data Type structures can also be used in Data Mappings and allow you to quickly and easily transmit and convert data through the Intely app.
Create a Data Type
To create a new Data Type, navigate to the Connect application and select the left menu option for 'My Data Types'. This will show the data types created under the current organization. Even if there are no data types shown, you still have access to the public data types for use in mappings and step references. From the data type screen, select 'Create Data Type' to create a new (blank) data type.
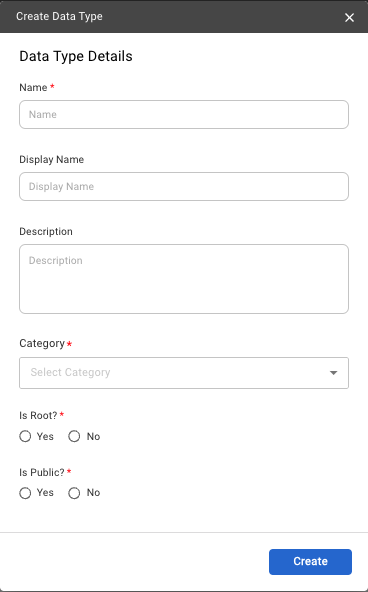
Data Type Details
- Name: (Required) Internal reference name of the data type. Will not be used often.
- Display Name: External reference name of the data type. This is what shows in the UI when using the data type.
- Description: User defined overview of what data set this Data Type represents.
- Category: (Required) The type of data that will be in the Data Type.
- List Values:
- FHIR R4B
- HL7 v2.x
- C-CDA
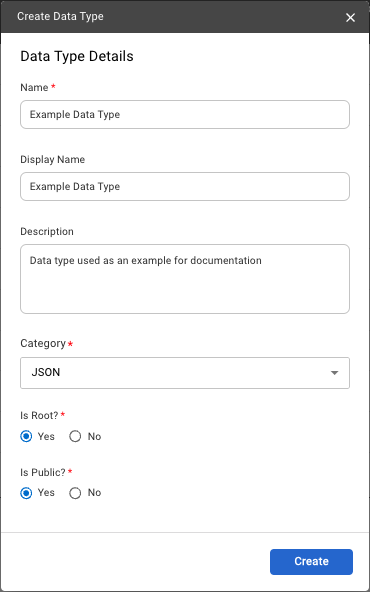
- JSON
- When creating a JSON data type, you have the ability to upload a sample file and 'import' the file as a data type.
- Key-Value
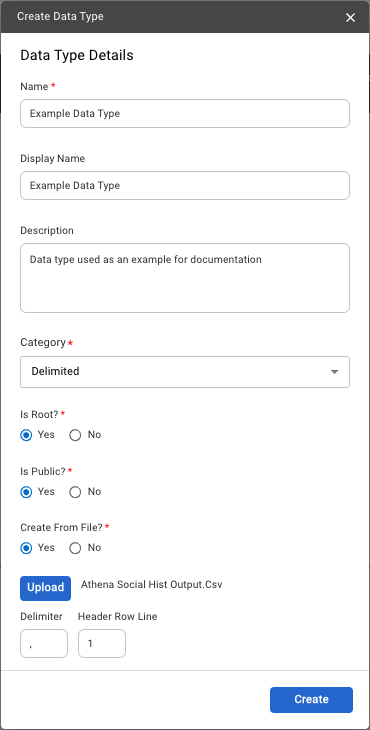
- Delimited (CSV/Flatfile)
- When creating a Delimited data type, you have the ability to upload a sample file and 'import' the file as a data type.
- List Values:
- Is Root?: (Required) Determines if this data type is treated as a root element. Root data types are treated differently than embedded/child data types.
- Is Public?: (Required) Determines if this data type is available to users outside of your organization
Examples for different categories of Data Types
New JSON Data Type:
New Delimited Data Type (with upload):
Add/Modify/Delete fields on a Data Type
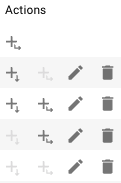
To add a field to the data type, you can put it below the current level or create another element as a child of the current/selected element.
-
This will place the new field as a child element of the selected row. It is the first (only) option when adding the first field to a new (blank) data type.

-
This will place the new field as an element at the same level as the selected row. It also allows you to 'insert' a new field between existing fields if needed.

- Edit field details of an existing field in the current data type.

- Delete the current field (at the current row). This will also delete any child elements of the selected field.

New Data Type Fields
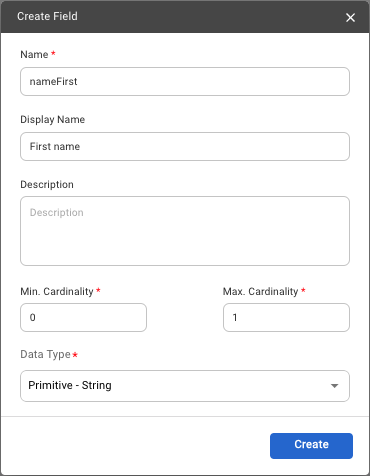
Field Details
- Name: (Required) Internal reference name of the data type. This should match what the external API is expecting.
- Display Name: The name that this field will be referred to from the UI
- Description: Brief about what this data is representing
- Cardinality
- Min: (Required) Minimum number of instances of this field. 1 denotes a required field, 0 denotes an optional field
- Max: (Required) Maximum number of instances of this field. 1 denotes a single field returned, * should be used if the element repeats
- Data Type: (Required) The type of data that is being represented (string, integer, date, etc.). This is also where you can select another data type that has been created and 'embed' it in the current data type.
- Embedded data types cannot be altered when referenced, any changes must occur directly on the referenced Data Type.
Import/Export a Data Type
Data Types that have been created in the Connect app can be imported or exported between organizations. This can serve as a way to create new versions quickly or use an existing data type as a template/new starting point for edits. Imports for data types must be the saved export file from another data type existing in the Intely platform.
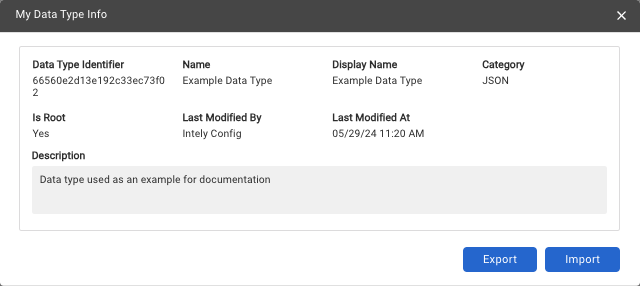
Export Data Type
From inside the data type (data type edit view), select ellipsis to the right of the 'Save' button in the top right corner of the screen. This will open the Data Type Info modal where you can see information related to the data type in context. Select the 'Export' button and you will be prompted with a modal to select which data types to export. If the data type has embedded data types you will see those listed here, otherwise it will have a single option for the data type in context. After selecting the applicable data types, select 'Export' to download the export of the data type(s). This downloaded file can now be used to import a data type.
Import Data Type
From the data type dashboard (My Data Types in left menu), select the 'Import' button to the left of the 'Create Data Type' button in the top left portion of the screen. This will open your file browser. Navigate to the appropriate data type file (that should be an export from another data type in Intely) and select 'Open'/'Ok'. You should be prompted with a confirmation modal to verify that the data type should be created. Select 'Yes' to create the data type and be redirected to the Data Type Edit view with the imported data type in context.
Example Data Types:
Click on the image to zoom in!
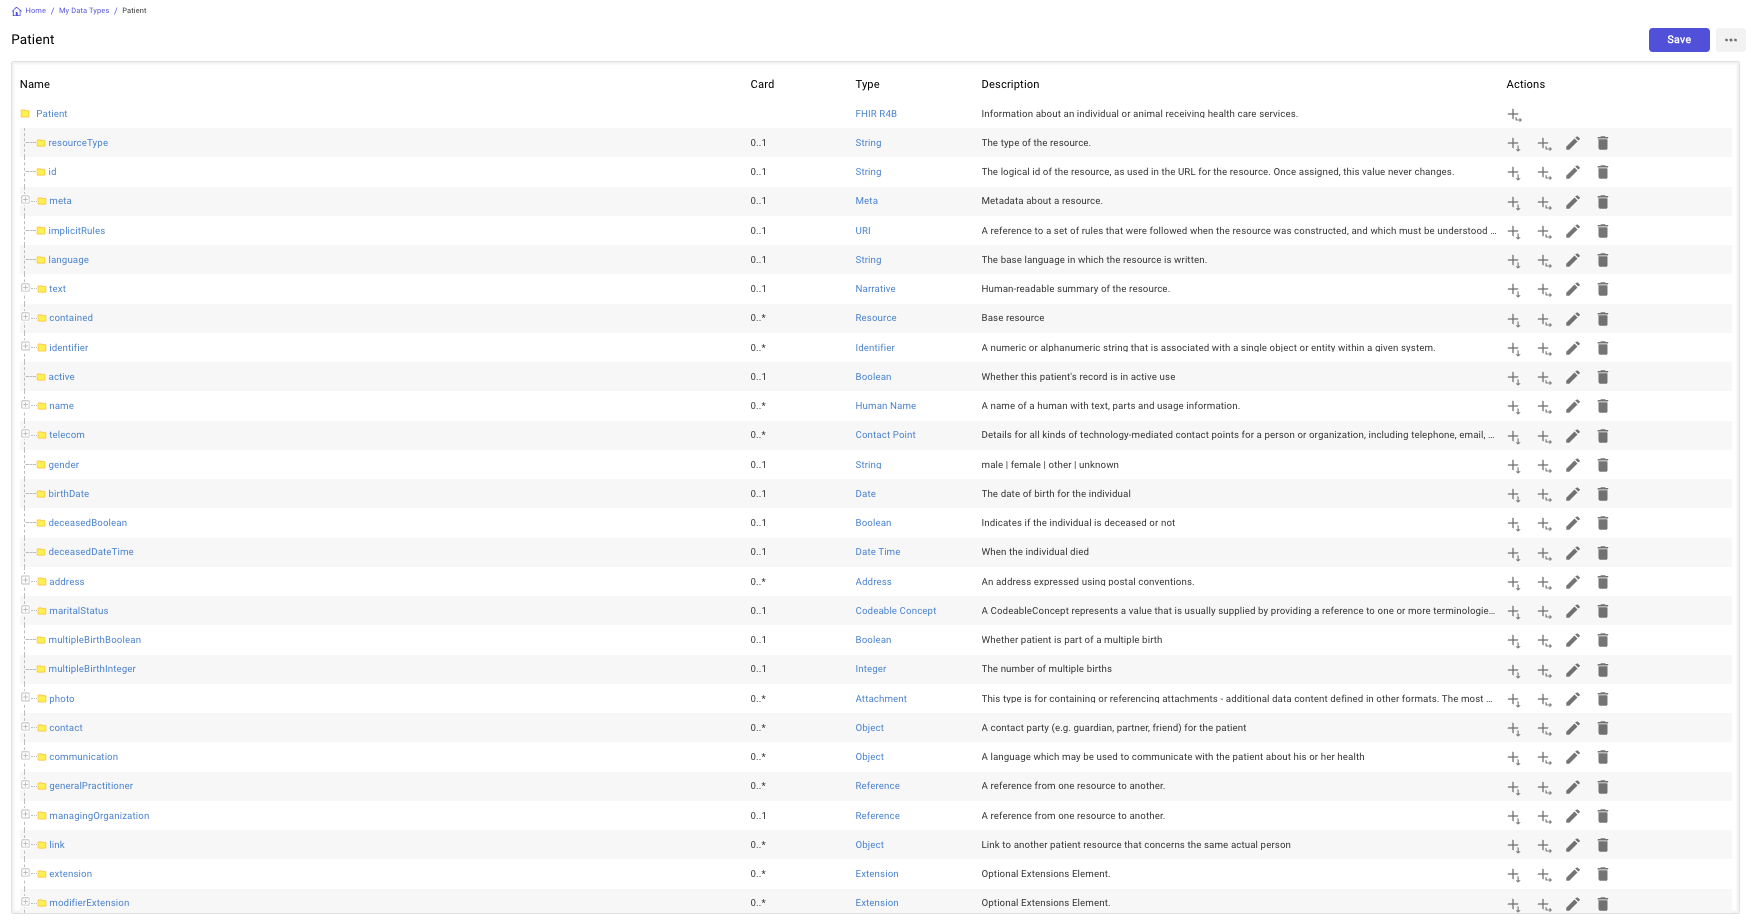
An example standard Data Type for the FHIR Patient Resource
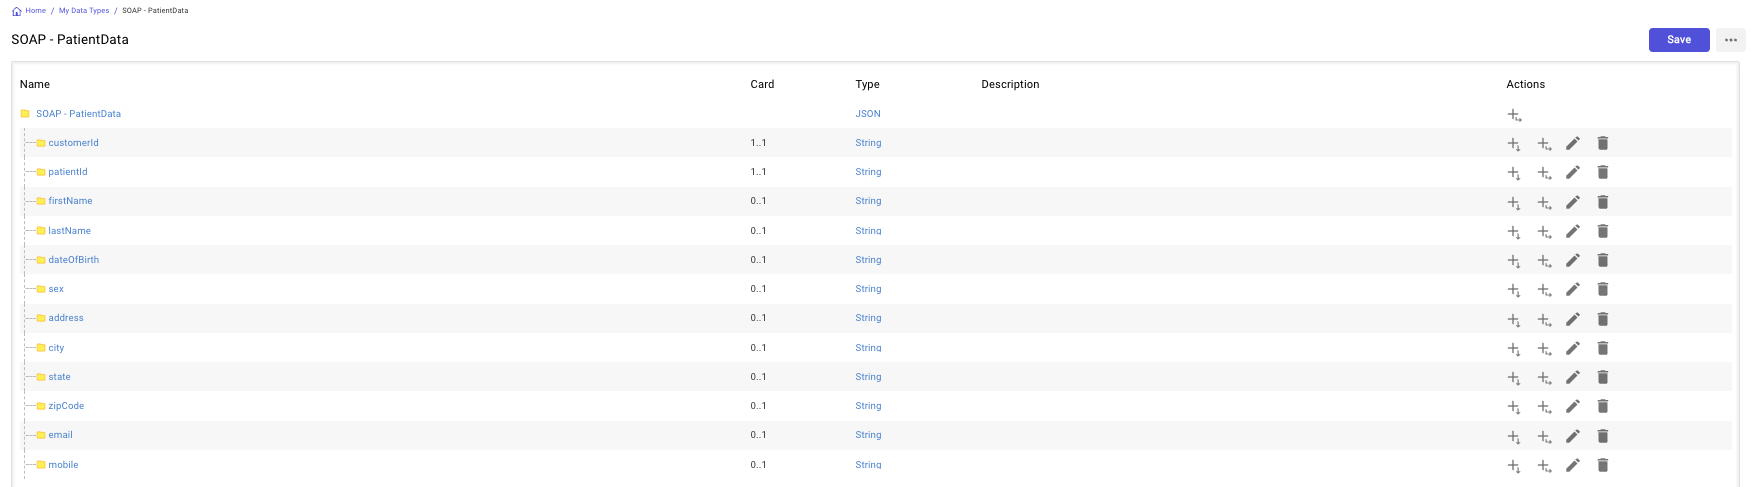
An example user-defined Data Type for a Patient Resource
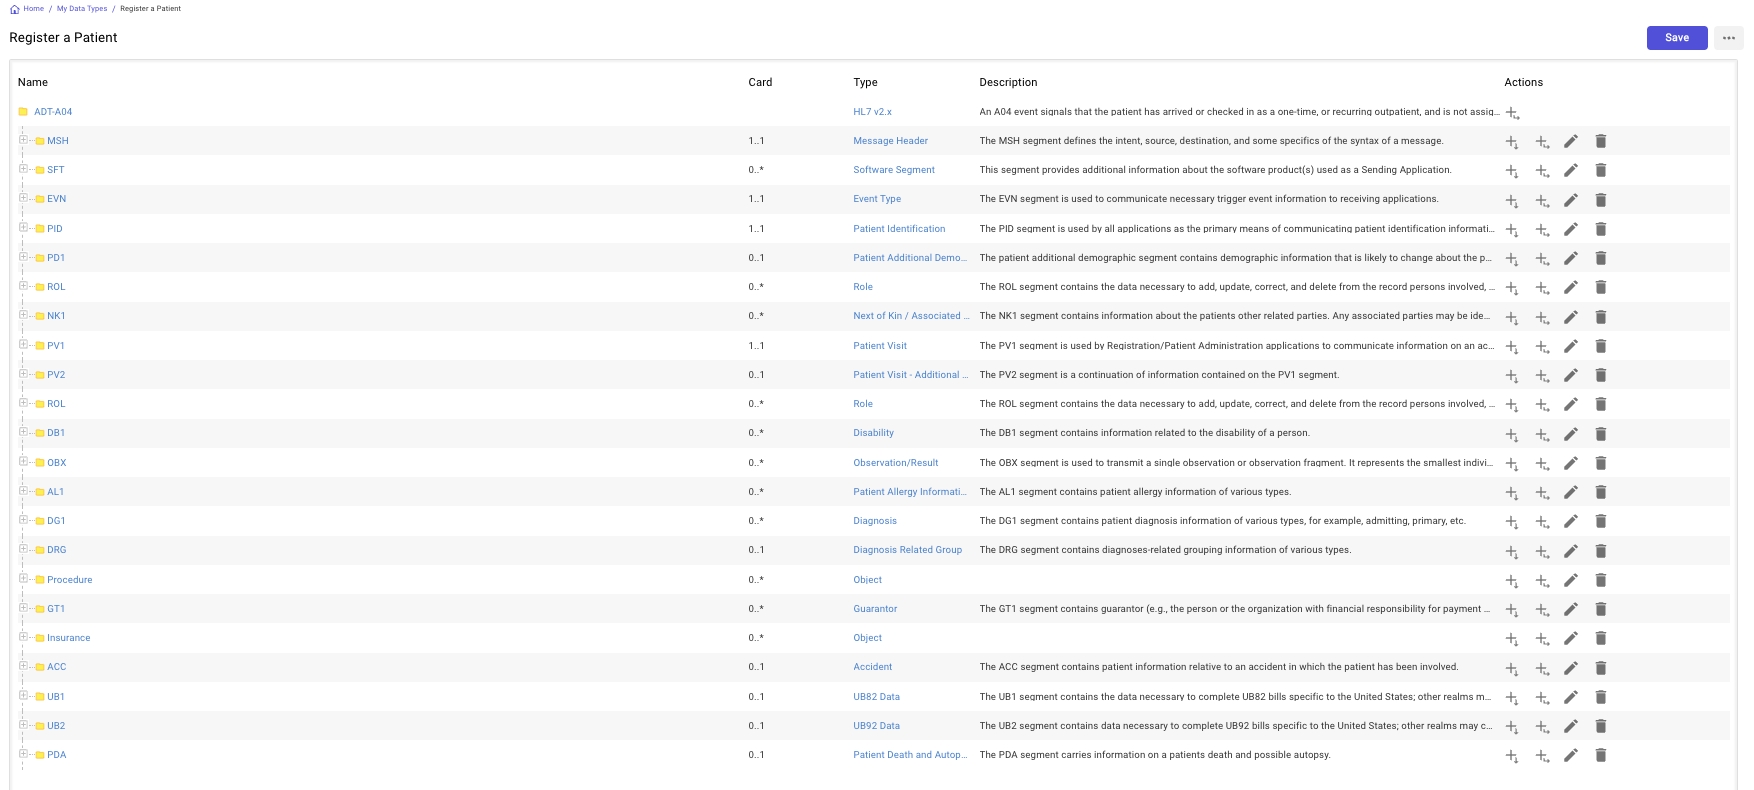
An example standard Data Type for an ADT_A04 HL7 v2.x Message
Updated 10 months ago